AD

Thursday, January 26, 2012

Illin: My trip to the $2.80 Japanese wonderland, Daiso

Hi!

After eating at Wi Marm, my sister and I decided to pay Daiso a visit for the first time ever!
We were super excited when we started to turn the corner............. Daiso is massive!!!

 Waaaaaaaa!

They even had little trolleys!
It's so well planned out. Two trolleys can squish through most aisles in the store!

 They had so many types and colours of hangers!!!! So cute!

Hair colour stick *giggles* I guess this is for grey hairs? I wonder if it works... 

 My favourite little toy at the store!!! So cute!!! It had magnetic hands!

Food erasers!!!!!!!!! So cute and so dang realistic.

One of my favourite items in the store! Little eraser pencil cap 'mascots' 

I think everyone has seen those creative bento boxes? Well these are sauces for it!
Adorable! There were even vehicle versions!

And this is how you get the sauce in.

 They had everything you could think of! But I was disappointed that there were no snacks :(

And this is what I ended up with.....

And these for the house:
A whiteboard for shopping lists on the fridge and a liquid dispenser for detergent!

Close ups*
Plastic container to hold my tafe books 

Waterproof Eyeliner 

 A4 Paper holder since my old ones from 3 years ago are starting to rip :(

Cutting mat! MUCH NEEDED 

 Ears for a 'Pretend Cat' hehehe

 Eyeliner Coat

 Embosser... I tried this.... dissappointed.
Ear fluffer thingos for my boyfriend. He lost his and was really sad :( haha. 
Sooo hard to find. Seriously. 

And those are the items I purchased on my trip to Daiso!
The total ended up being around $22. 
I don't know if it was worth it. Not really.

Can't wait to use the eyeliner though! Yay!

Wednesday, January 25, 2012

When I buy eggs...: First time purchasing clothing from op shops!

I think it was only last week that I realised that yarn was so cheap at second hand stores!
Vinnies at Bonnyrigg sells them for $3 a bag (Includes about 8 balls)!! While you can buy a ball of yarn for that very same price!

My sister loves op shopping and (believes) she finds so many nice pieces of clothing.
I've always thought that clothes from op shops were eerie since people have passed away in them.
After finishing off at Fairfield we decided to drop by The Smith Family. I was on the look for yarn and pretty crocheted place mats... But none were to be found :(.

My sister the little bargain hunter pushed me to try on a forest green dress and a navy blue pair of high waisted shorts.

I did and I was so happy that I did!

The dress was so nicely made and fit every inch of my body. The shorts were very stretchy and comfy!

After checking the tags of both items, it turned out that the pair of shorts was still new with their tags retailing for $50! Then my sister told me that the dress was by Honey & Beau which we had purchased for only $10 at The Smiths Family.

$10 Honey & Beau Dress

$2.50 New with tags High Waisted Shorts

I'm pretty sure people haven't passed away in either of these pieces of clothing ☺.
I got both for $12.50 all together!

Happy!

Sunday, January 15, 2012

Interesting...: 5 of the Cutest Creatures in the World!

This is a small list of a few creatures I think are adorable :)

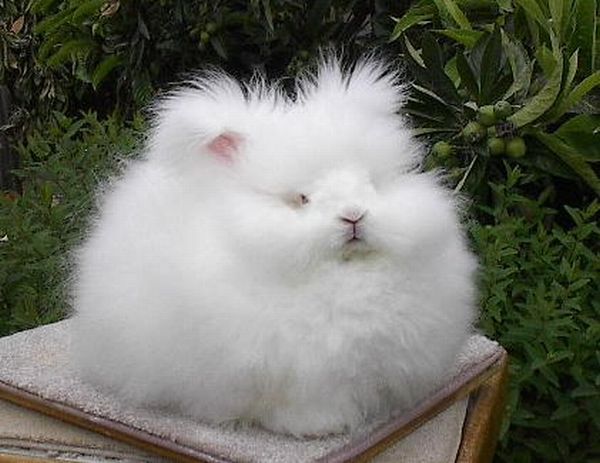
Angora Rabbit
(Img source: here)

Just because it's a big ball of fluff!

Dwarf Hamster
(Img source: here)
*squeals
There are three types of these cuties!

Woolly Bear Caterpillar
 (Img source: here)
Eee so fluffy! They are the larvae form of the Isabella tiger moth. 
I believe this is a gif of the cutie:


Fennec Fox
(Img source: here)
Sooo cute! They look like a lil baby pokemon to me.

And last but not least....

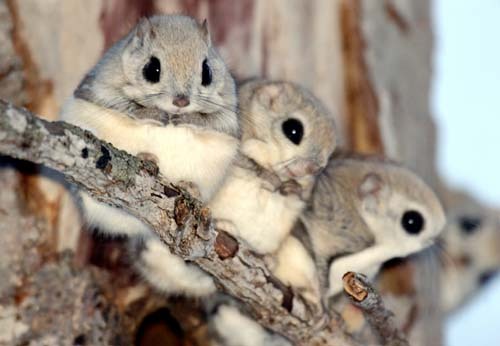
Momonga
aka Japanese Flying Dwarf Squirrel
(Img source: Tumblr)
Ahhhh!
Look at that lil ninja fella peeping in on the right!

I hope this post has filled you with many squeals as much as it did for me when I discovered them ☺!

Wednesday, January 11, 2012

Craftin' it up!: My progress into mastering the art of crocheting

I think in the past month and a half I've gone through a lot of craft phases..........
One moment knitting, next felt plushies, then crocheting and now a bit of jewellery.

I began crocheting a few weeks ago and I'm having a lot of fun with it! It's my favourite out of all the crafts I've learnt so far.

 Here is a timeline of my pieces starting from when I first began. I only started buying the yarn I wanted to use recently... So the yarn I'm using in the first few pics are scraps from my knitting days (hehe... days)

Before I got into crocheting, I watched videos and videos and after being fed up I gave up.
But the little crocheting needles were calling me to come and have a go again so I did...

24th December 2011
Here is my first ever crocheted piece! I used scrap yarn that I had kept from year 6 hehe.
I was so excited with the outcome! It was meant to be a circle... I don't know why it turned into a semi circle.
The little piece on the left was a mistake I had made :(

3rd January 2012
My second crocheted piece. I don't know what I was crocheting this time. I just wanted it to become a circle but instead it turned into a scoop of rainbow icecream. I really like it though.
The yarn I used was really hard to handle since it kept knotting up... I had to buy yarn quick!

6th January 2012
I made a trip to Spotlight and purchased a cream shade of acrylic yarn. Again, I didn't know what I was going for and it ended up turning into a mushroom!

7th January 2012
At first I was just knitting a ball and decided to add some pieces to make it into a bunny! The ears were a bit complicated to make :(. And the eyes aren't in properly since I hadn't secured the inside... Which I can't secure as I've already closed up the opening.

8th January 2012
Two little dumpings... I made these two little guys starting off with a magic ring. The turned out so big! I hink I'll turn them into mushrooms.. Or little onigiri snacks.

9th January 2012
 
I went to Big W and purchased brown/greyish yarn. 
I decided to make a mushroom ornament for my boyfriend's car.

 10th January 2012
I went to Vinnies looking for some cheap yarn... I found red yarn for $1! Yay! Sooo cheap.
So I decided to make a mushroom.
The second image is the first and second attempt at making the perfect bottom spool for my mushroom. I ended up sleeping at 4am.

What's with me and mushrooms? I don't know.


I'm still have quite a bit to go before I can say that I'm good at crocheting.
It's really challenging since 80% of the items I crochet, I have no idea what I'm doing....


Tuesday, January 10, 2012

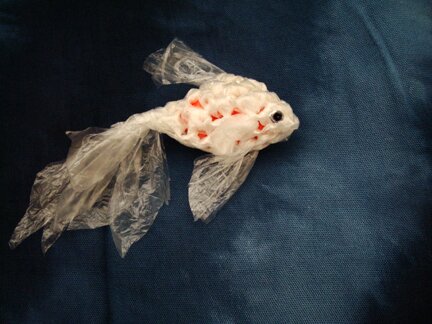
Finds: DIY Plarn fish

I've always heard of people knitting with the good ol' fashion yarn but never plastic! 
'Plarn' is made from strips of plastic bags. 
I've seen images of finished products made out of plarn and always thought it was a bit odd looking... But this fish is beautiful!

Genuine Mudpie has provided a tutorial on how to make this pretty fella! 
Check it out here.

(D.I.Y} Chain necklace

Hi!


This morning I received my eyepins from eBay so I decided to get started on making some jewelery,
after thinking about what to make I came up with an Idea to attach a chunky chain to a piece of 30cm chain and make a necklace out of it!

This is just a tutorial on how to make one yourself :D


Steps:
1. Measure around your neck and leave out about 1/6th as that length will be where the thick chain will go.
My measurement was 25cm.

2. Fold it over to double the length so, 25cm = 50cm 
3. Cut! You can leave a bit excess if you want since we'll measure it again later.
 4. Open a few jumprings


 5. Thread one end of the necklace chain into one open end of the thick chain

 6. Thread the other end of the necklace chain into the other end of the thick chain

 6. Thread it all the way through until it looks like this. It will be in a U shape with a loose end on either side.
 7. Pick up one end of the necklace chain
8. With a open jump ring, put it into the ring of the necklace

10. Hook a clasp onto the open jumpring and close shut

11.With the other loose end of the necklace chain, hook a jump ring through and close shut.


 12. Hook either ends together, the clasp to the closed jump ring.

 13. At this point, you are to measure it on yourself and see if the necklace fits the way you like it, remember that this necklace has two layers so they both have to be the same size!

Now cut in the middle of the extra necklace chain. If it is too long, cut extra but make sure that both sides are even!
 14. Once it's been cut off you can hook the left side to the left jump ring and right side to the right jump ring.

 15. Unhook the left jumpring
 15. Put on the left chain that had just been cut. There will be 3 things dangling off this jump ring, two chains and a clasp. Close shut.
 16. Unhook the right jump ring.
17. Put on the right chain that we had just cut. There will be two things dangling from this jumpring, these would be the two chains. Close shut.


18. And we're done!


Yay!

If you try out this D.I.Y, tweet me!!! I would love to see your finished pieces :D